

How We Build Serverless Audio Blogs with AWS on a Scale


Did you know that there is an amazing feature where we transform your text blogs into an audio-enabled podcast experience?
For example, look at this post:
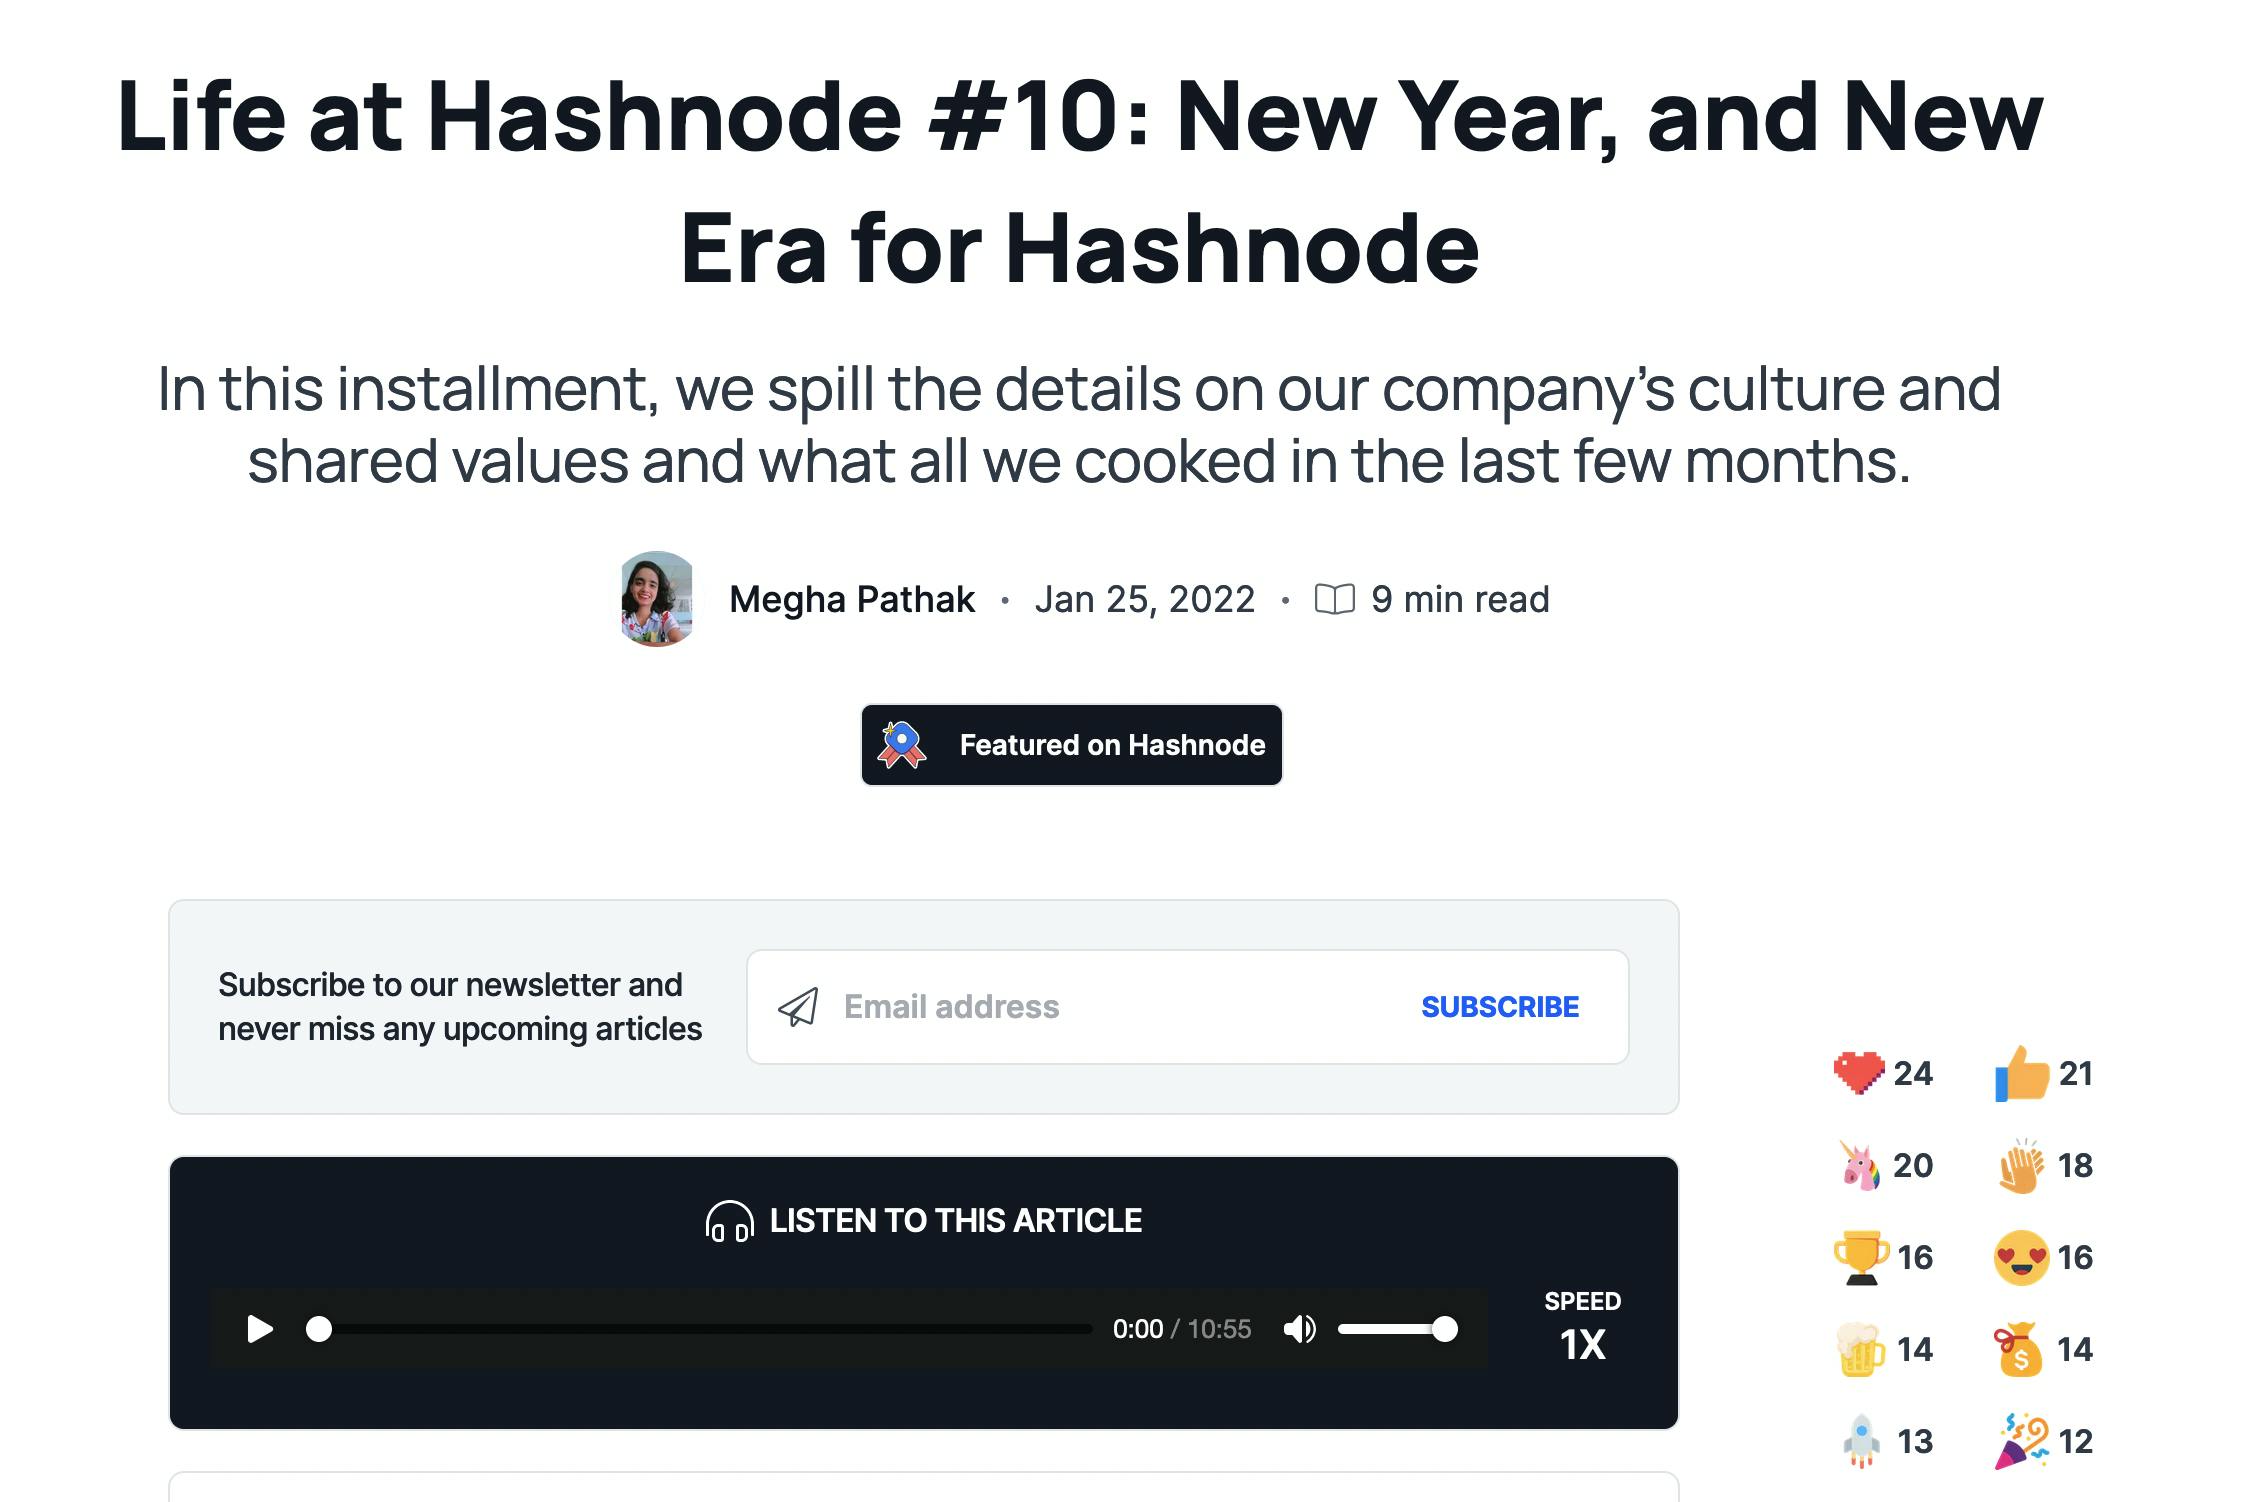
You can simply hit play, and listen to @learnwithmegha 's article talking about our new company culture and recently joined team members (e.g. me).
We've introduced this feature in detail here.
The whole solution is based on a serverless solution in AWS.
This post gives you an overview of what services we used and how you can build the same thing. We also include code and a CDK repo to get you started.
Audio Blogs
There was a great introduction to the Audio Blogs feature here in the townhall blog. Since this is an engineering blog, I don't want to go into the feature details.
In essence, you can turn your blog post into an audio format and listen to that. This feature is currently restricted to Ambassadors.
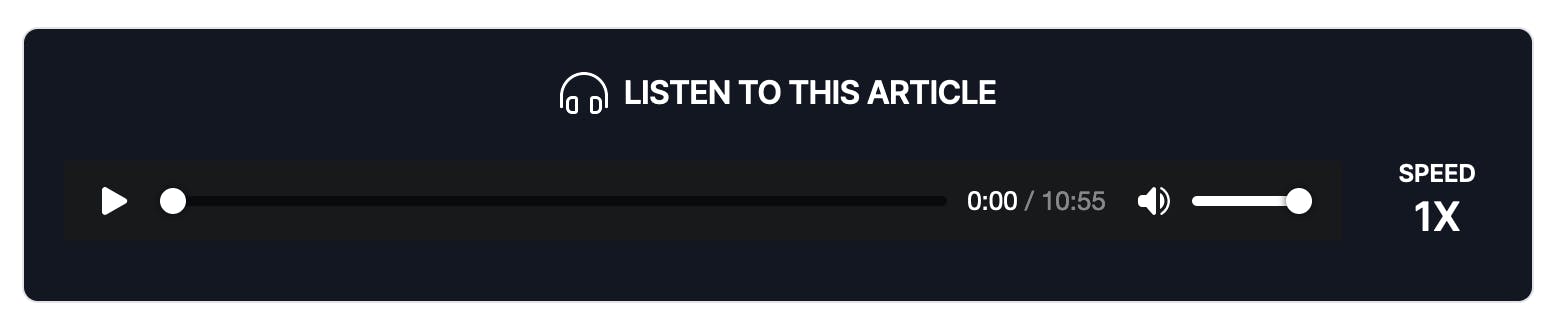
For example, if you open this article, you can hit play and listen to the article instead of reading it. Awesome, right?
Now let's dive into the technical side of things.
Why Serverless?
There are many ways of developing such a feature. We've decided to it in a serverless way for different reasons:
Infrastructure
We do not want to handle any infrastructure. We also don't want to choose instance types and things like that. We just want to give the customer a good experience when listening to articles. With serverless, we just focus on the outcome and the business logic.
On-Demand Costs
We do not need a server running 24/7. Building audio blogs is a perfect event-driven use case. For example, if a user creates a new blog post, an event arrives with the content. The system transforms text into speech, saves it, and it is done. No further workloads are needed.
Scaling
At Hashnode, we need to build solutions that scale. We already get 10,000 blog posts a month and we are just at the beginning 🚀 With serverless solutions, scalability is included automatically. We don't need to handle that anymore.
Architecture
Now, let's have a look at the basic architecture.
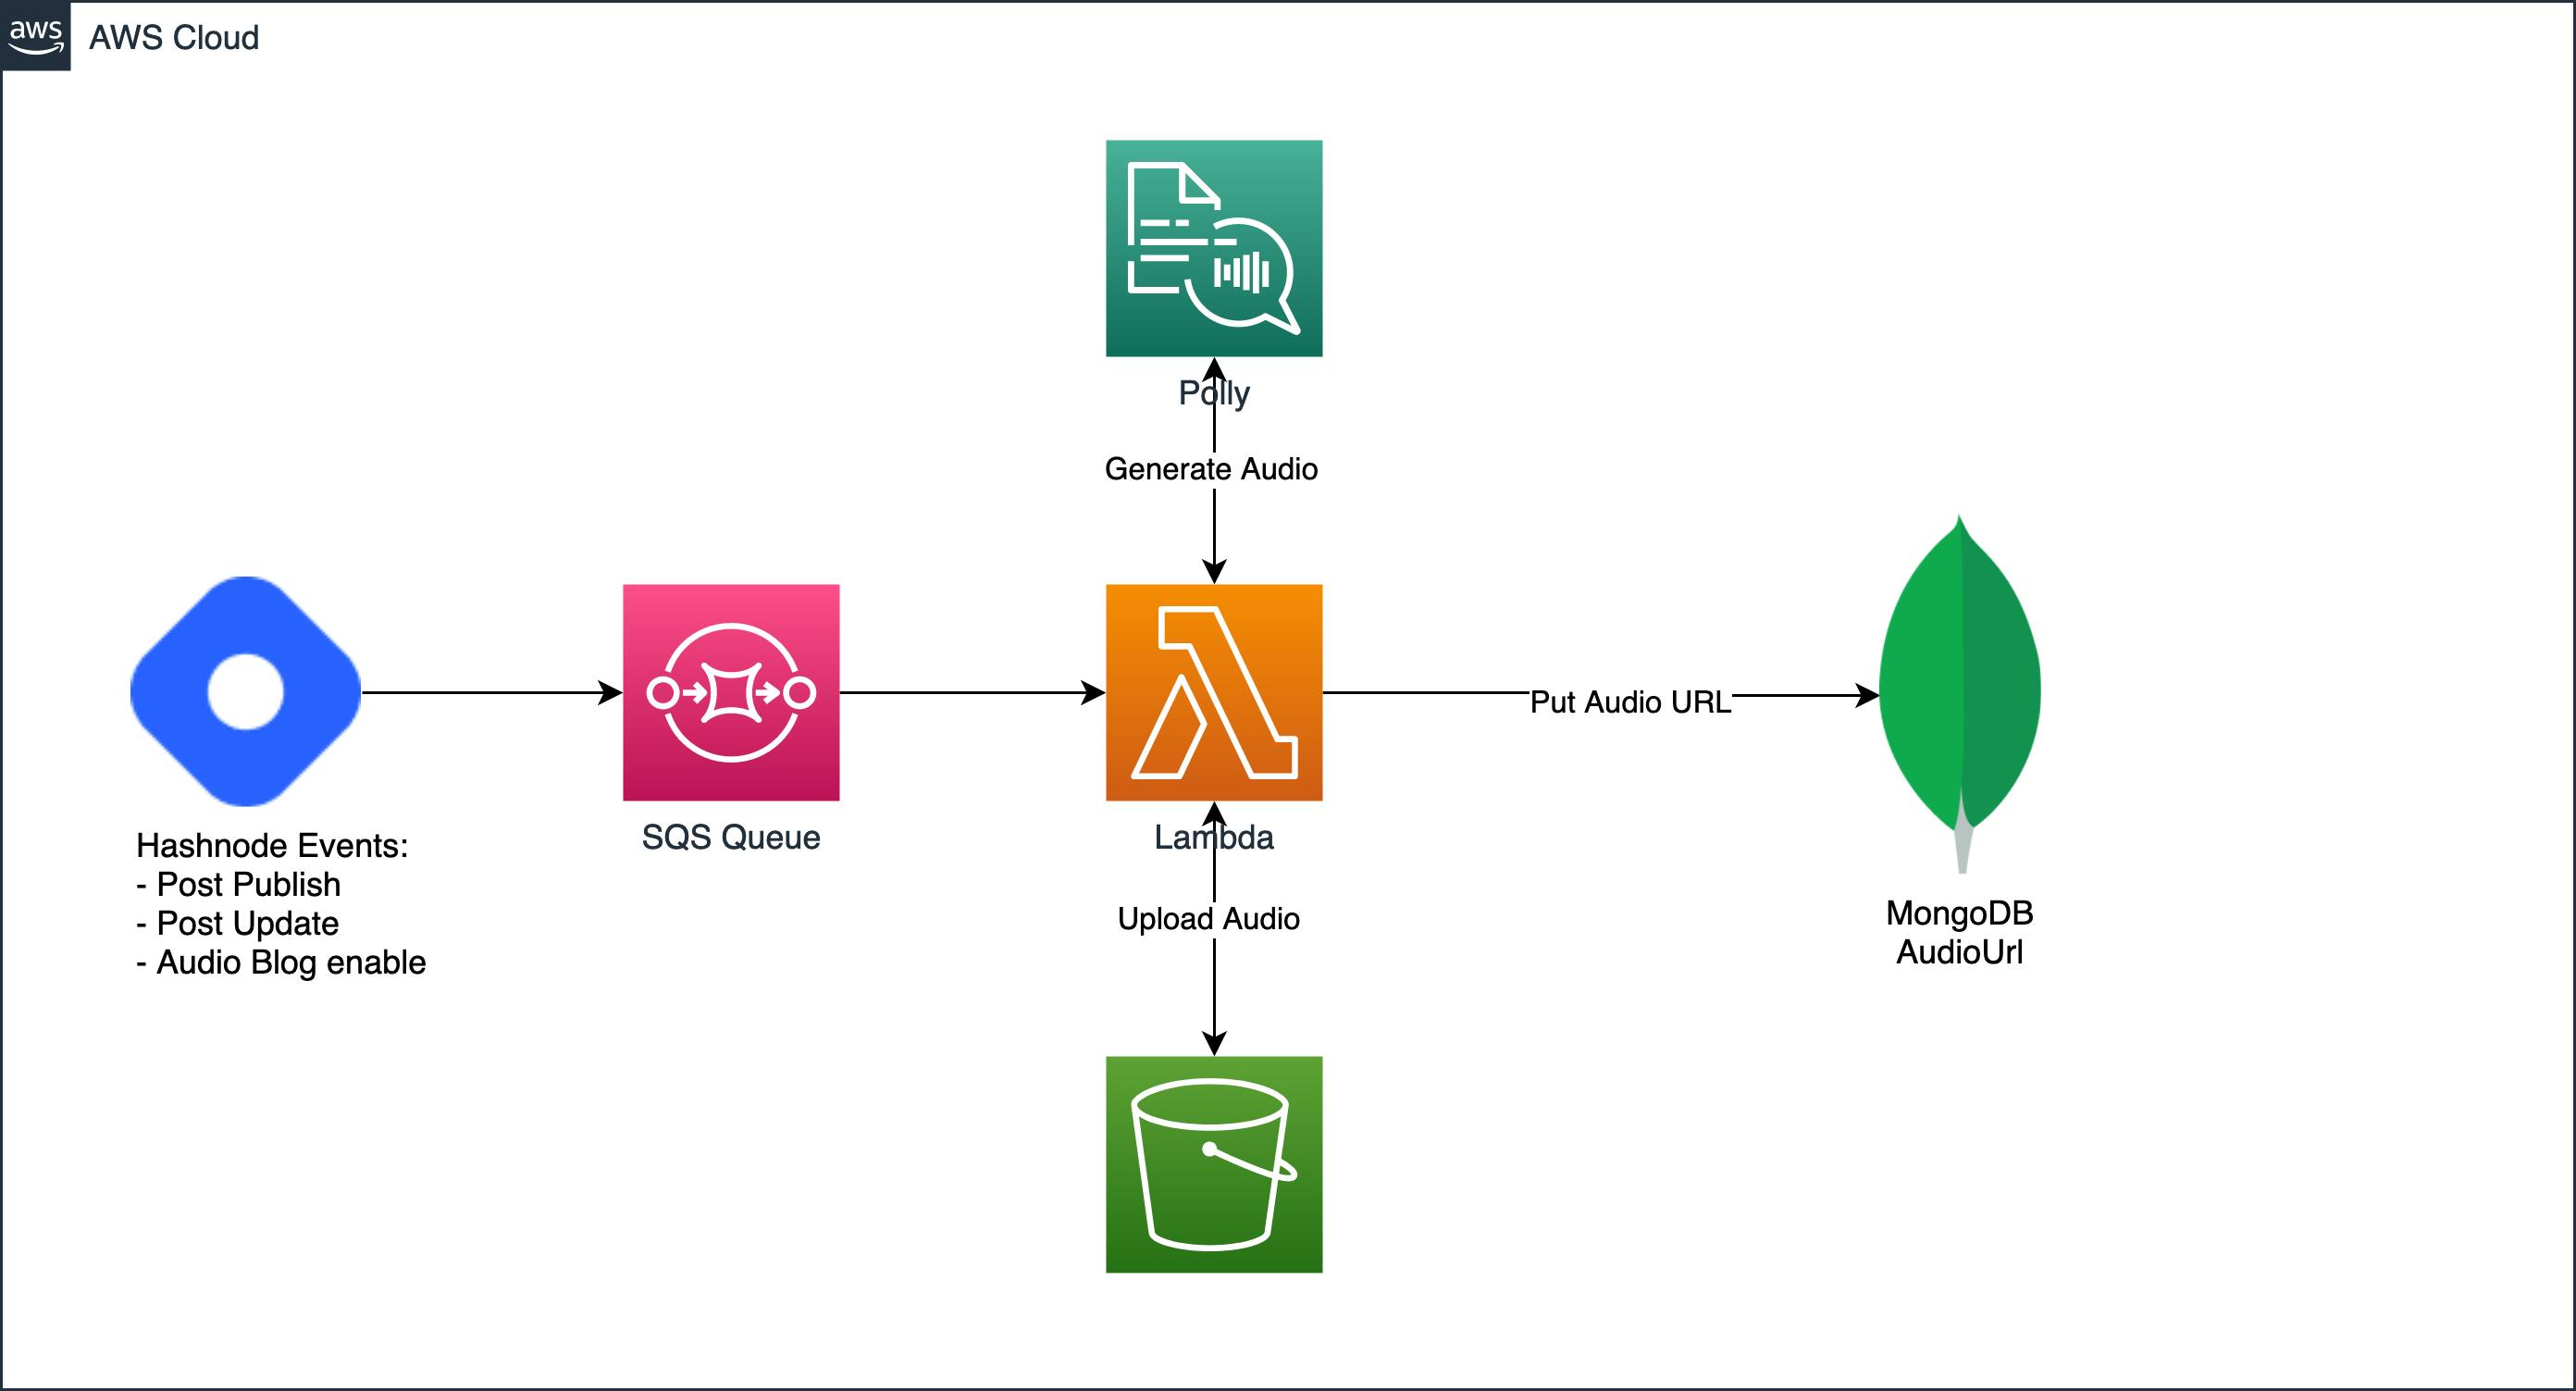
The architecture consists of six different components:
- Hashnode API (Node.JS)
- Amazon SQS
- Amazon Lambda
- Amazon Polly
- S3
- MongoDB
Serverless is a lot about plugging services and events together. I'll show you how we do that.
Node API
Let's start with the Node.js API. The API runs in Express with JavaScript (or TypeScript depending on the repository). For some actions, we trigger events with an event listener. For example, if you create a new post we will post an event post_published. This will trigger certain actions, for instance, the creation of the audio blog, in case audio blogs are enabled.
If an audio blog is enabled, we push the message directly to SQS - Simple Queue Service. This service provides a queue and sends all messages to Lambda.
SQS
SQS is the queueing service of AWS. It provides many functionalities for building event-driven systems. This is a perfect example of that. The event comes in (blog post) and will be passed to lambda. In case there are many events in the same second, they will be queued and sent to lambda. Many messages can be bundled together and be worked on in batches.
SQS will then launch several lambdas (as much as it needs) to work on these messages.
Lambda
Lambda executes the business logic. Lambda is a great service. It will simply execute your code without the need of specifying any infrastructure. You only define your code (and memory) and you are good to go.
The lambda in this is doing several things:

The input event is the whole blog post. We just need the content and the title of that post. Since you are writing the blog posts in Markdown, we first need to get rid of all the HTML characters. We sanitize the HTML into pure text.
For Polly (AWS for Text-to-Speech) is able to understand the text we need to transform the text into Speech Synthesis Markup Language - SSML. A more detailed documentation can be seen here. SSML adds tags such as:
<speak><break>
With these tags, the text can sound more natural to the reader.
Amazon Polly can only handle chunks of 1,500 characters at one time, so we also need to split this text into chunks. The whole process of building SSML and splitting the text requires an external library, SSML-Builder. This makes it very convenient, and we can build SSML with common chaining syntax. For example, we can build it like that:
import Speech from "ssml-builder";

const speech = new Speech();
speech
    .say(HASHNODE_INTRO)
    .pause("1s")
    .say(title)
    .pause("500ms")
    .say(content);
After that, we simply split it into chunks with SSML-Split and map through the chunks to generate the audio buffers with Amazon Polly.
Polly
Polly is the text-to-speech service of AWS. It allows us to pass text and we can generate audio in a variety of different languages and voices. In this case Matthew is reading your blog posts.
S3
S3 is the Object Storage of AWS. We concat all Audio Buffers together and upload them to S3. All audio files are stored here.
MongoDB
MongoDB is one of our main stores for blog posts. Each blog post has an additional attribute called audioUrl where the audio URL of S3 is saved. This one will then be embedded in your blog posts.
Let's Code
Do you want to build a similar solution? Great!
We've treated a CDK repository with the whole AWS architecture included to get you started quickly. Everything is written in TypeScript and uses the CDK for provisioning and deploying your resources.
Simply clone the GitHub repository:
git clone git@github.com:Hashnode/serverless-tts-polly.git
Bootstrap your CDK environment (create your named profiles) before that:
cdk bootstrap
And deploy everything
cdk deploy
Now you have a bucket, a queue, and a lambda. Go to your lambda, create a test event from the template SQSEvent, and hit Test.
Event:
{
  "Records": [
    {
      "messageId": "19dd0b57-b21e-4ac1-bd88-01bbb068cb78",
      "receiptHandle": "MessageReceiptHandle",
      "body": "Hello from SQS!",
      "attributes": {
        "ApproximateReceiveCount": "1",
        "SentTimestamp": "1523232000000",
        "SenderId": "123456789012",
        "ApproximateFirstReceiveTimestamp": "1523232000001"
      },
      "messageAttributes": {},
      "md5OfBody": "{{{md5_of_body}}}",
      "eventSource": "aws:sqs",
      "eventSourceARN": "arn:aws:sqs:us-east-1:123456789012:MyQueue",
      "awsRegion": "us-east-1"
    }
  ]
}
After that, you'll find a link in your return statement with the actual generated audio. Response:
[
  "https://serverlessttspollystack-generatedaudioebf51e70-t0glhf55xtkf.s3-us-west-1.amazonaws.com/50"
]
It takes the body string in your SQS event and transforms it into audio!
That's it. You've converted text into audio in a matter of seconds. This solution scales. If I enabled audio blogs on a blog with 30 blog posts, it will be finished in under 10 seconds!
Deep Dive
Let's quickly look at some of the files and what is happening in there.
CDK App:
bin/serverless-tts-polly.ts
#!/usr/bin/env node
import 'source-map-support/register';
import * as cdk from 'aws-cdk-lib';
import { ServerlessTtsPollyStack } from '../lib/serverless-tts-polly-stack';

const app = new cdk.App();
new ServerlessTtsPollyStack(app, 'ServerlessTtsPollyStack', {});
The CDK entry point is always an app. This app can define several stacks to deploy. In this case, we just have one stack, which is the ServerlessTtsPollyStack. The stack gets the app itself as an instance, some id, and optional additional props.
Stacks
All stacks are defined in the lib folder.
lib/serverless-tts-polly-stack.ts
export class ServerlessTtsPollyStack extends Stack {
  constructor(scope: Construct, id: string, props?: StackProps) {
    super(scope, id, props);
    const queue = new aws_sqs.Queue(this, "PollyQueue");
    const bucket = new aws_s3.Bucket(this, "GeneratedAudio");

    const lambda = new NodejsFunction(this, `tts-polly`, {
      memorySize: 1024,
      timeout: Duration.seconds(15),
      handler: "main",
      entry: path.join(`./functions/audio/index.ts`),
      environment: {
        bucketAudioBlogs: bucket.bucketName,
      },
    });

    lambda.addToRolePolicy(
      new aws_iam.PolicyStatement({ actions: ["polly:*"], resources: ["*"] })
    );

    lambda.addEventSource(new SqsEventSource(queue, { batchSize: 10 }));
    bucket.grantPublicAccess();

    bucket.grantReadWrite(lambda);
  }
}
This file defines all the AWS resources we need. It is doing the following
- Creates an SQS queue
- Creates a bucket
- Creates a TypeScript Node Lambda
- Adds SQS as an event source to the lambda
- Handles some IAM permission
Pretty straightforward, right?
Lambda
The actual business logic is inside of the lambda function in functions/audio/index.ts
import { SQSEvent } from "aws-lambda";
import Speech from "ssml-builder";
import SSMLSplit from "ssml-split";
import AWS = require("aws-sdk");

const s3 = new AWS.S3();
const polly = new AWS.Polly();
const HASHNODE_INTRO = `This audio blog is powered by Hashnode, which is the easiest way to start a developer blog on a custom domain, and find audience.`;
const BUCKET_NAME = process.env.bucketAudioBlogs!;

export async function main(event: SQSEvent): Promise<any> {
  const records = event.Records;

  return await Promise.all(
    records.map(async (record) => {
      return await handleAudioGenerationAndUpload(record.body);
    })
  );
}

const handleAudioGenerationAndUpload: (
  text: string
) => Promise<string> = async (text) => {
  const speech = new Speech();
  speech.say(HASHNODE_INTRO).pause("1s").say(text);
  const speechOutput = speech.ssml();

  const ssmlSplit = new SSMLSplit({
    synthesizer: "aws",
    softLimit: 1500,
    hardLimit: 1500,
    breakParagraphsAboveHardLimit: true,
  });

  const batches = ssmlSplit.split(speechOutput);

  const audioStreams = await Promise.all(
    batches.map(async (chunk) => {
      try {
        const audio = await _generatePollyAudio(chunk);
        return audio.AudioStream;
      } catch (err) {
        console.error("Error at following chunk: ", chunk);
        console.log("Error: ", err);
      }
    })
  );

  const buffer = Buffer.concat(
    audioStreams,
    audioStreams.reduce((len, a) => len + a.length, 0)
  );
  // This is not meant for a prod use 😜
  const s3Key = String(Math.floor(Math.random() * (100 - 0 + 1)) + 0);
  const response = await _uploadAudioToS3(s3Key, buffer);

  if (!response.ETag) {
    throw response;
  }

  return `https://${BUCKET_NAME}.s3-us-west-1.amazonaws.com/${s3Key}`;
};

const _uploadAudioToS3 = (key, body) =>
  s3
    .putObject({
      Bucket: BUCKET_NAME,
      Key: key,
      Body: body,
      ContentType: "audio/mp3",
    })
    .promise();

export const _generatePollyAudio: (text: string) => any = (text) => {
  const params = {
    Text: text,
    TextType: "ssml",
    OutputFormat: "mp3",
    VoiceId: "Matthew",
  };

  return polly
    .synthesizeSpeech(params)
    .promise()
    .then((audio) => {
      if (audio.AudioStream instanceof Buffer) return audio;
      else throw "AudioStream is not a Buffer.";
    });
};
This lambda function is preprocessing the text, transforms it into SSML, sends it to Polly, and uploads everything to S3.
Summary
In this blog post, we showed how one of our micro-services works and provide you with a GitHub repository to get started quickly.
If you are interested in building serverless things on a scale, check out our Careers Page or contact me on Twitter directly.
Have fun building!